How to Create Your First 24/7 Live Stream
Learn how to set up and launch your first 24/7 live stream on YouTube, Twitch, or any platform in under 5 minutes, with no hardware or software required.
Introduction
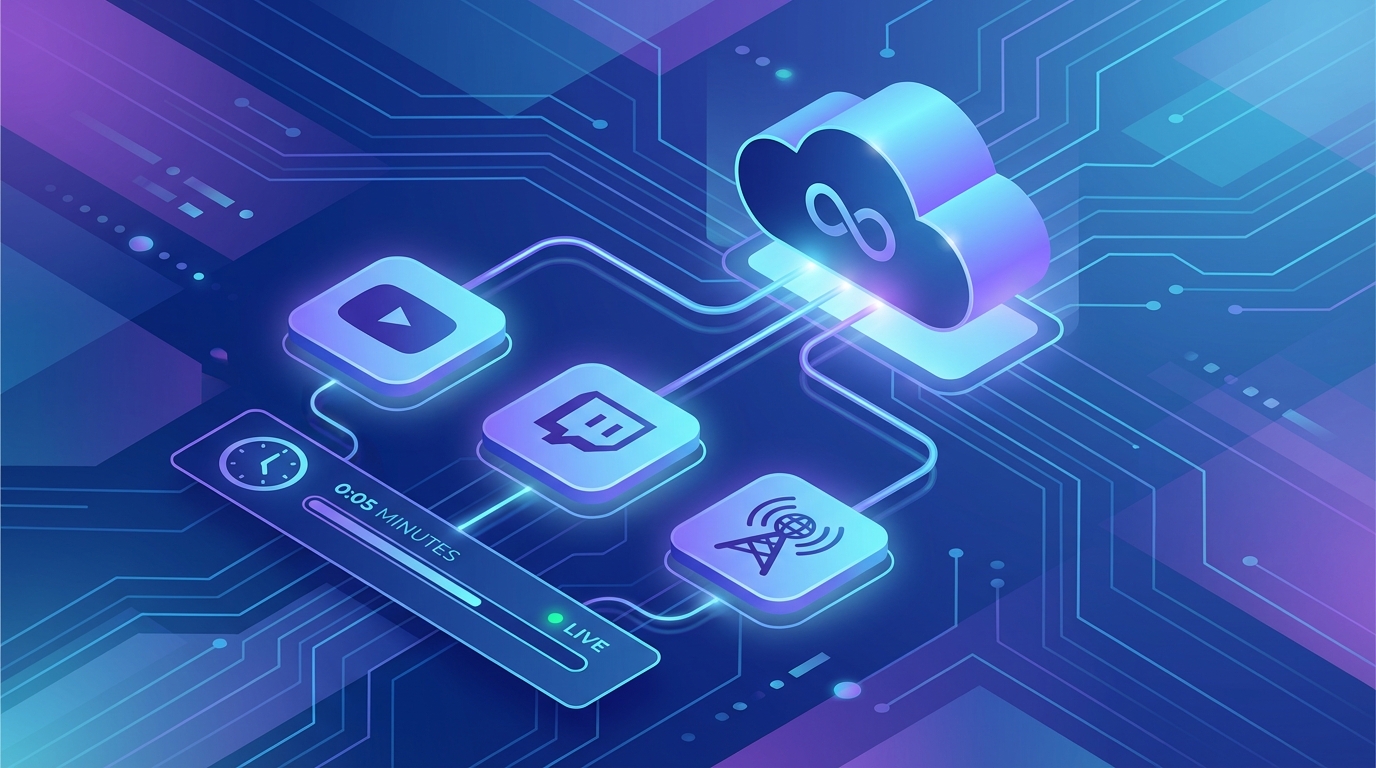
Running a 24/7 live stream used to require a dedicated computer running OBS around the clock. With playout.video, you can launch a continuous live stream entirely from the cloud, with no hardware, no downloads, and no babysitting.
This guide walks you through the entire process, from signing up to going live on your first platform.
What You'll Need
Before you start, make sure you have:
A playout.video account (the Free plan requires no credit card)
At least one video file to stream (MP4, MOV, MKV, AVI, or WebM)
A streaming platform account (YouTube, Twitch, Facebook, TikTok, or any RTMP-compatible service)
Step 1: Sign Up and Access the Dashboard
Head to playout.video and create your account. Once signed in, you'll land on the Dashboard, your central hub for managing live streams and media.
The dashboard shows your recent live streams and media library at a glance. If this is your first time, both sections will be empty, that's about to change.
Step 2: Upload Your Content
You need videos in your media library before you can stream. There are two ways to add content:
Upload from Your Computer
Click the Upload button on the dashboard or go to the Media Library
Select one or more video files from your computer
Supported formats: MP4, MOV, MKV, AVI, WebM
Wait for the upload and processing to complete
Import from YouTube
Already have videos on YouTube? Import them with one click:
Click the Import YouTube button
Paste the YouTube video URL
playout.video will download and add it to your library automatically
For a detailed guide on YouTube imports, see Importing Videos from YouTube.
Step 3: Set Up Your First Stream
Now let's create your first stream:
Click Create Live Stream from the dashboard or the Live Streams page
Upload your first content

Give your stream a name (e.g., "My 24/7 Music Channel")
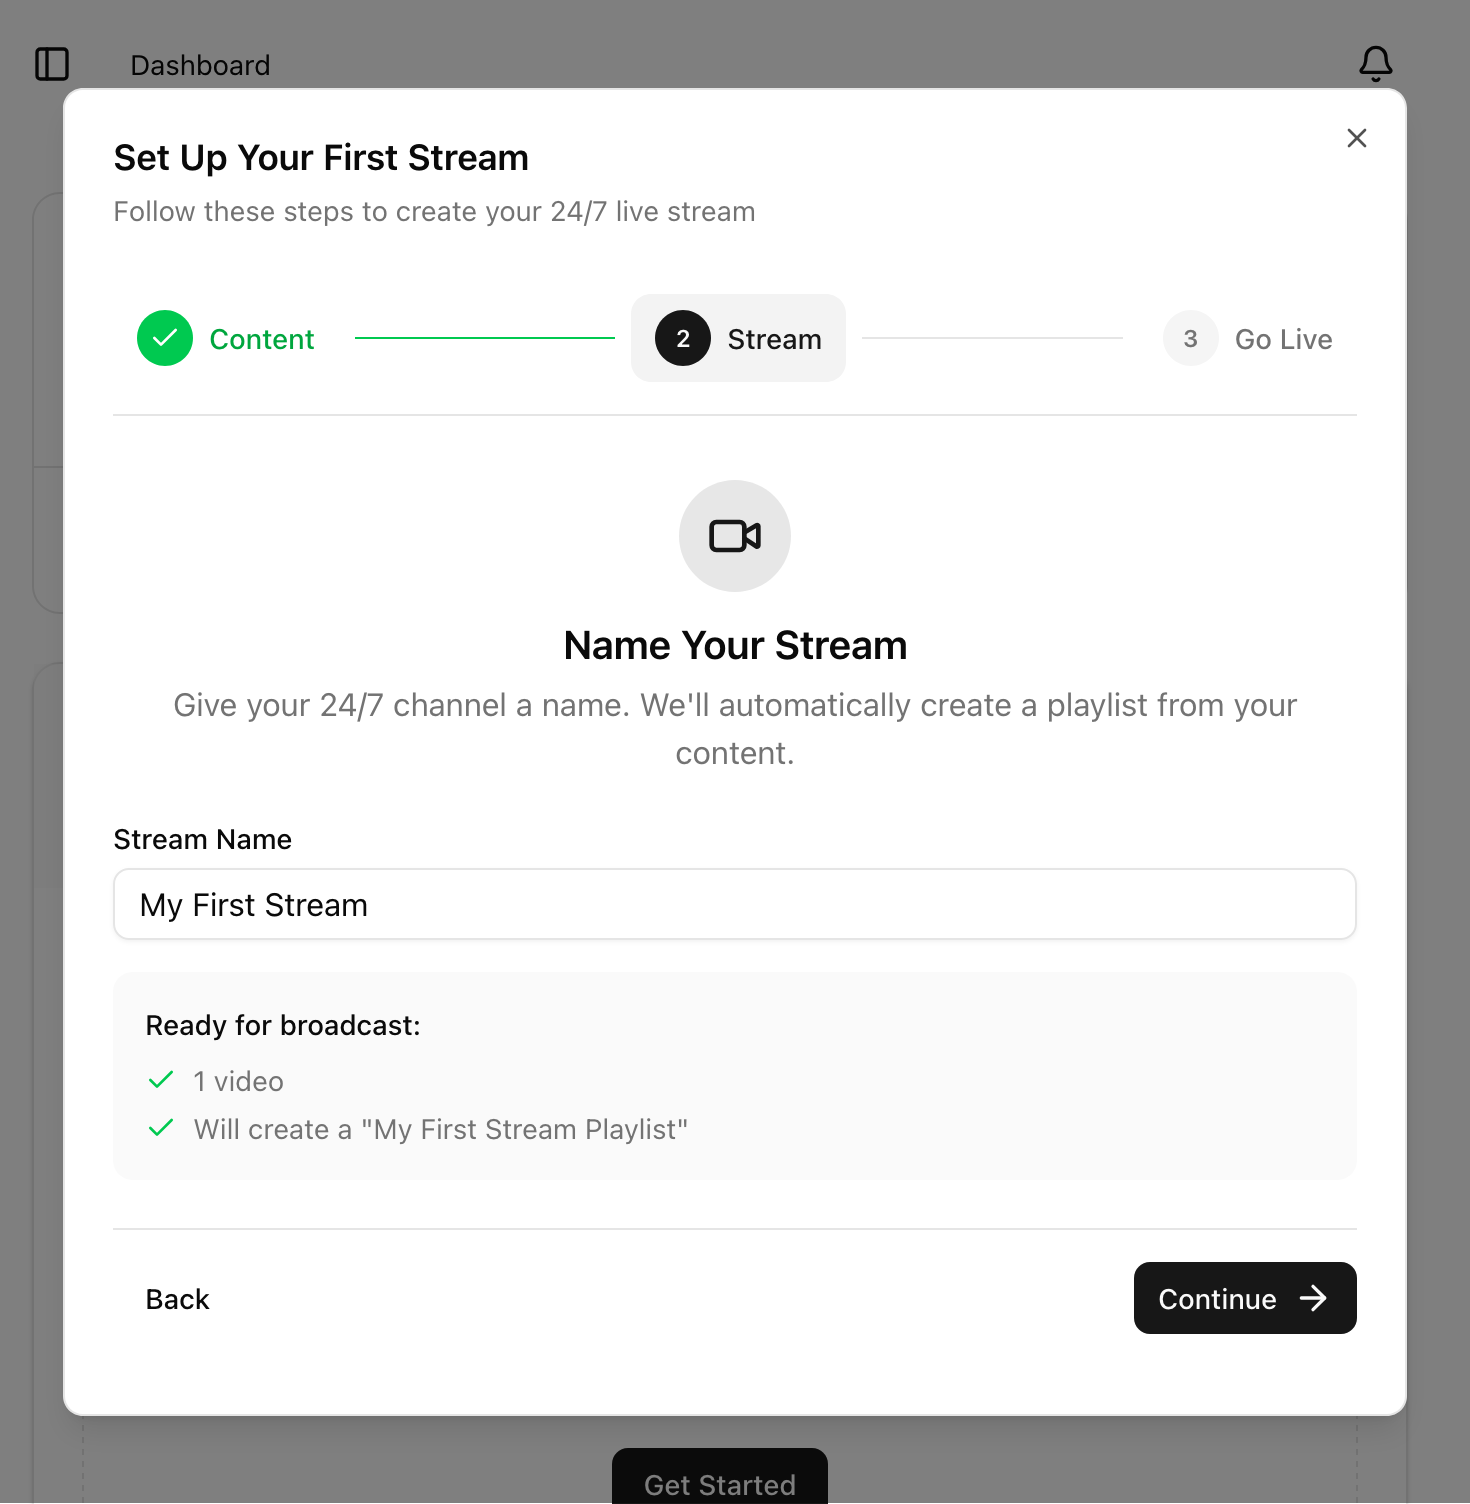
Connect your Social Channel
Click Create
You'll be taken to the stream management page, which has everything you need in the sidebar:
Playlist: the videos that will play in your stream
Destinations: where your stream will broadcast
Schedule: automated actions and timing
Settings: quality, aspect ratio, and other options
Step 4: Add More Content and Build Your Playlist
Go to the Media Library https://playout.video/files
Click New Button and select Upload Files, or alternatively just drag and drop the files to the browser window.
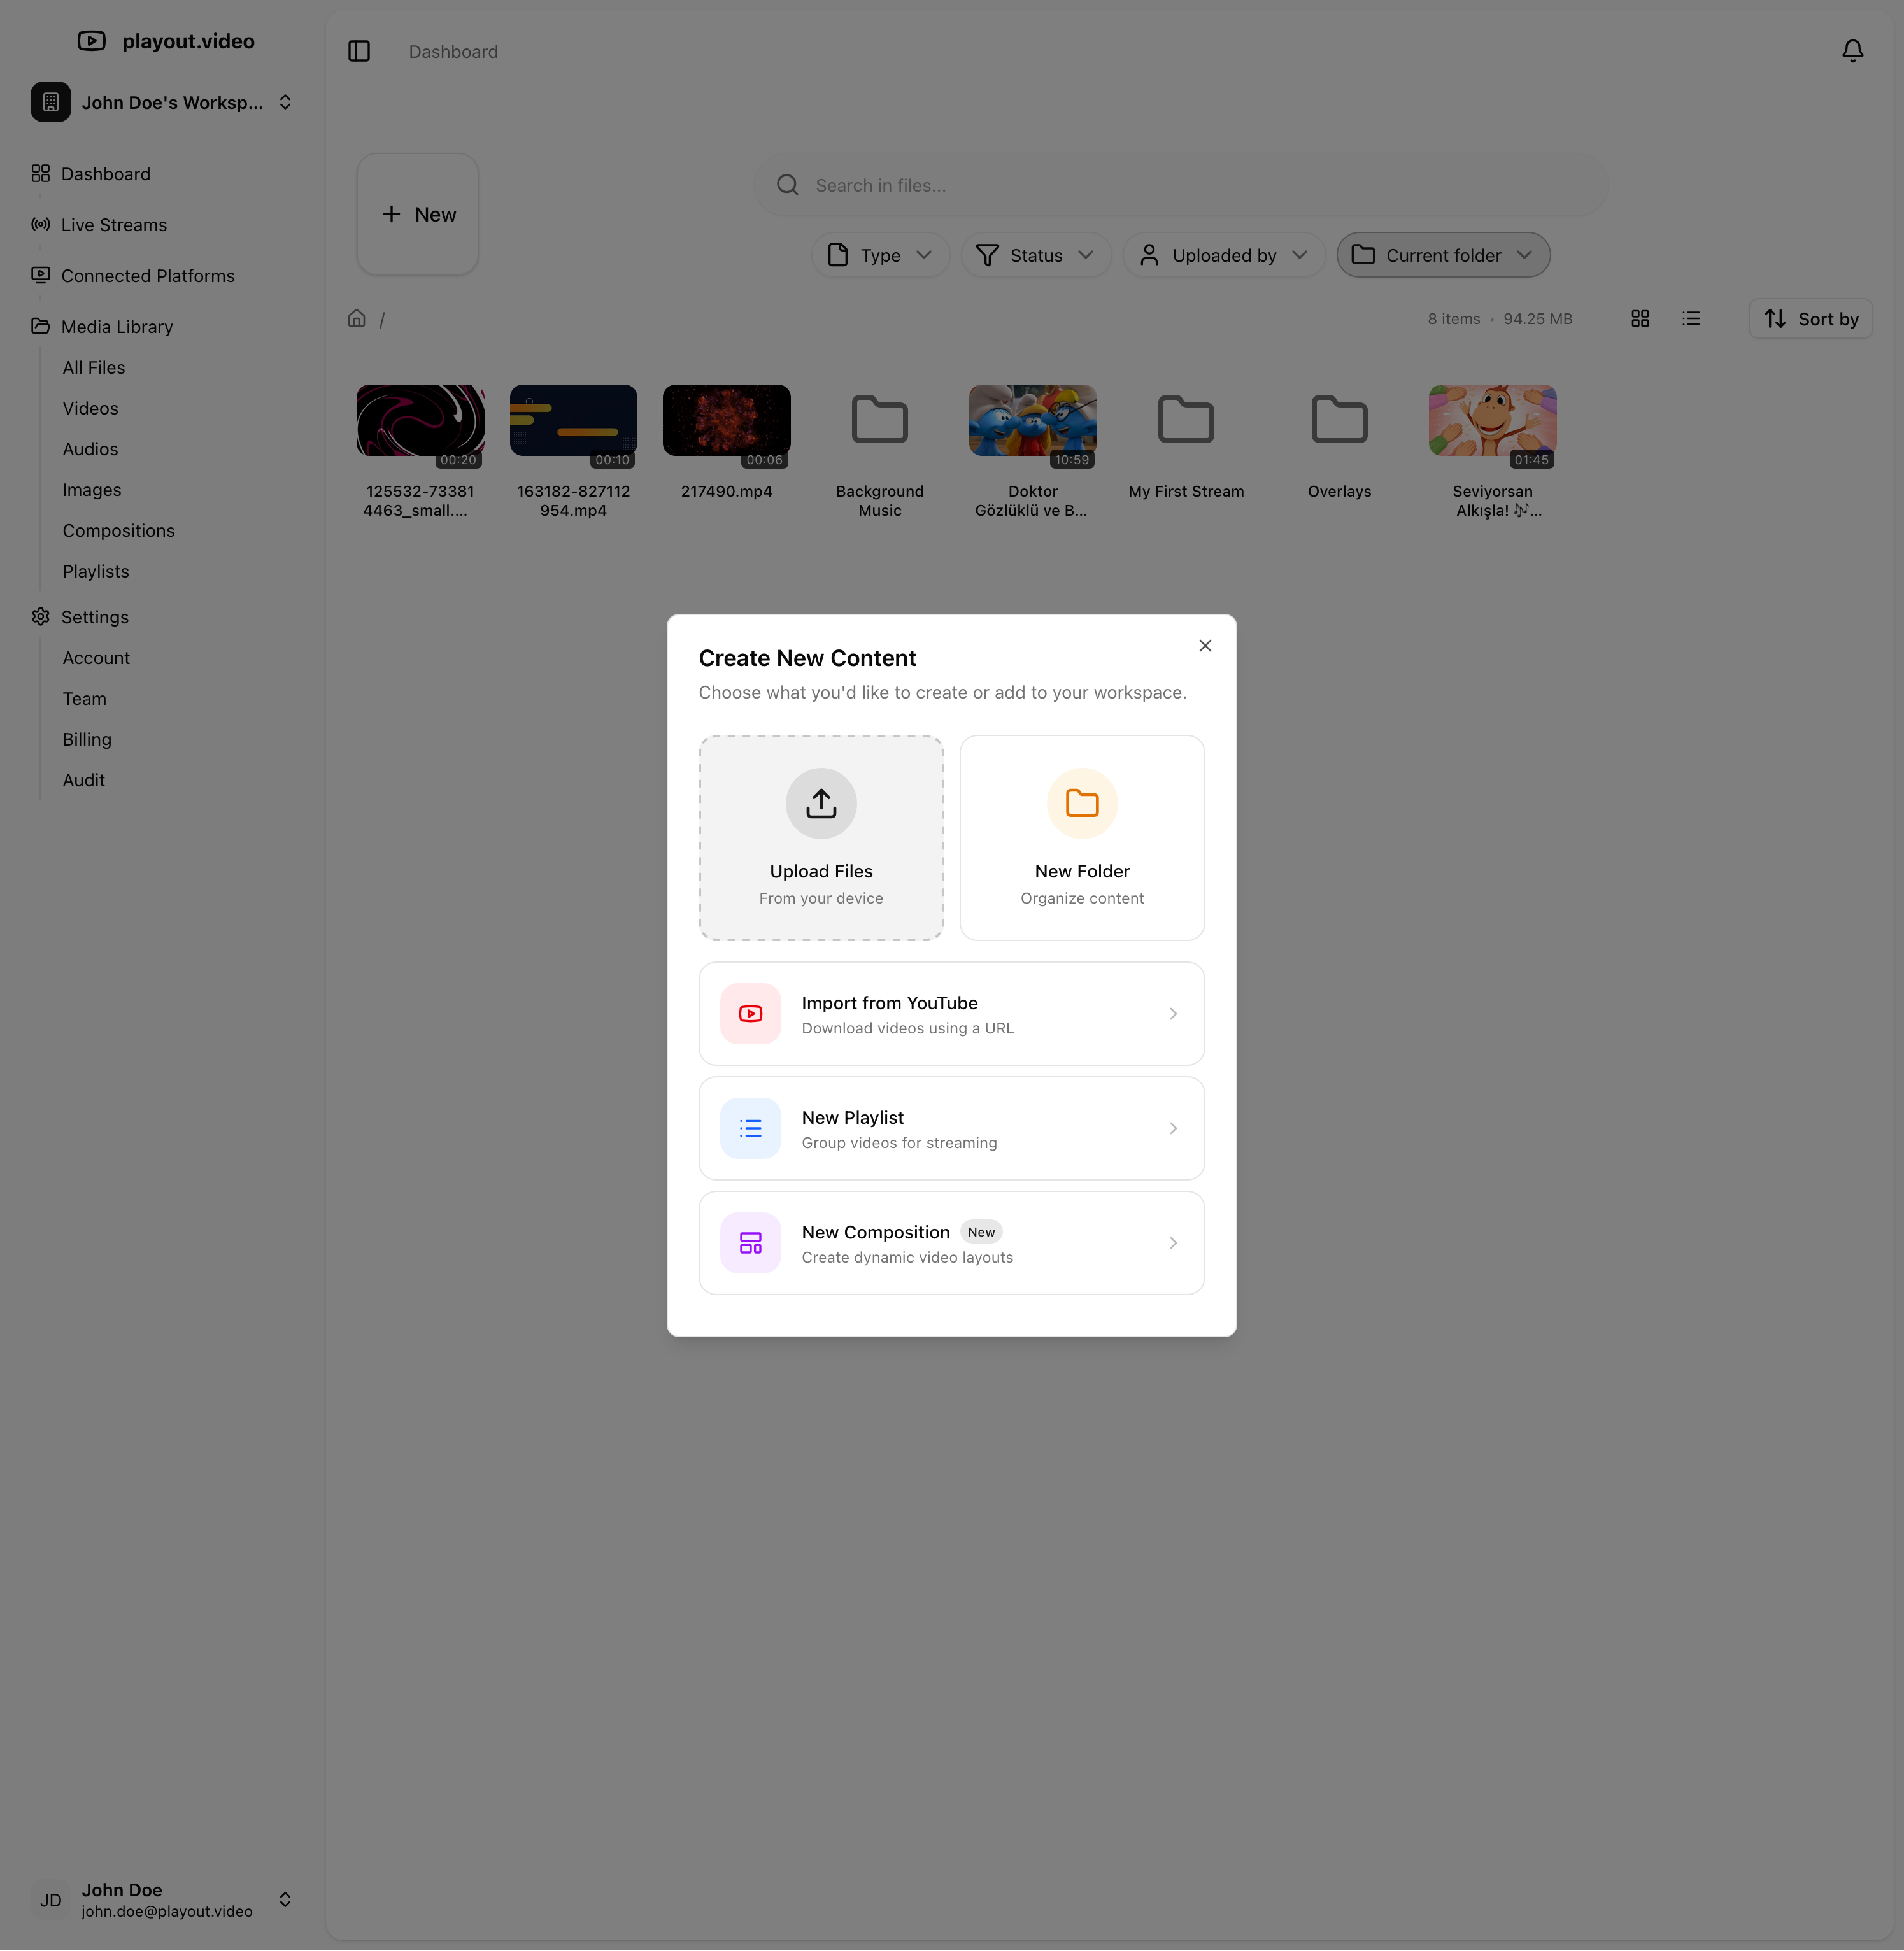
Your stream needs content to play. Let's add videos to the playlist:
Click Playlist in the sidebar
Get back to the live stream by clicking Live Streams on left side panel
Click Manage Live Stream button
Click Add Videos to browse your media library
Select the videos you want to include
Drag and drop to reorder them as you like
Your playlist will loop automatically by default. When the last video finishes, it starts again from the beginning.
For more playlist features like jingles and inline switching, see Building and Managing Playlists.
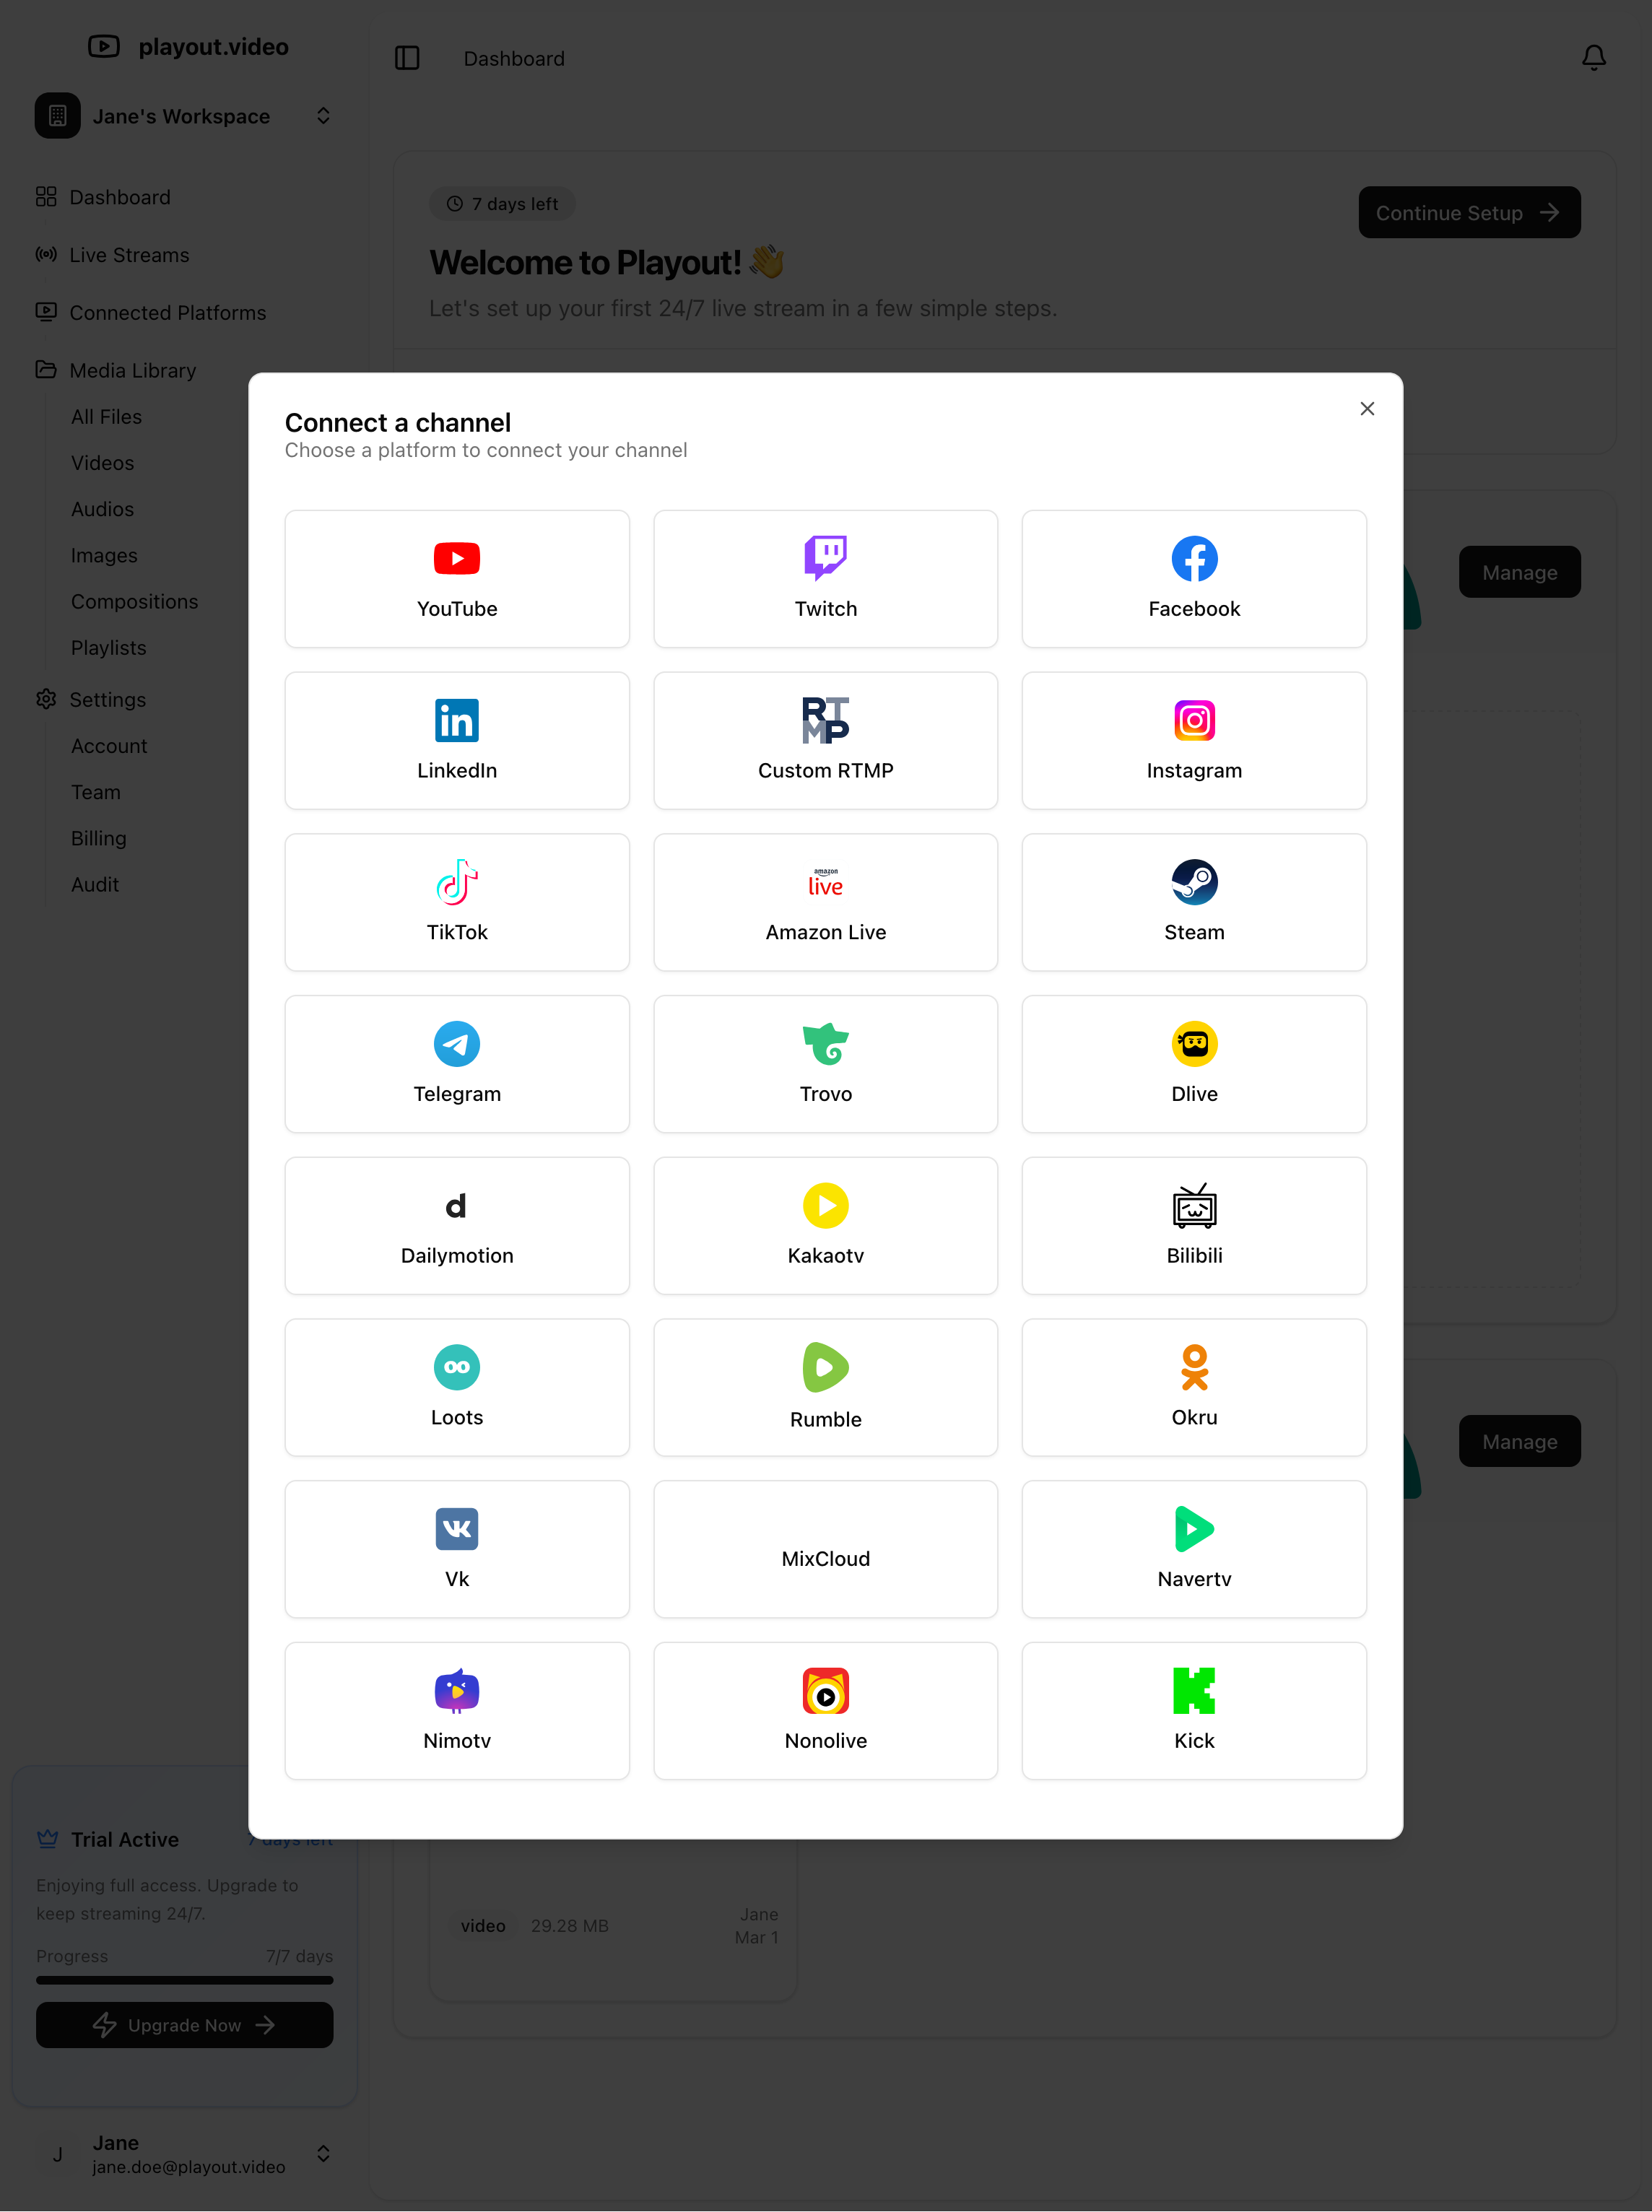
Step 5: Add a Destination
A destination is where your stream will be broadcast. Let's connect your first platform:
Click Destinations in the sidebar
Click Add Destination
Choose your platform:
YouTube: connect your YouTube channel via OAuth
Twitch: connect your Twitch account
Facebook: connect your Facebook page
TikTok: connect your TikTok account
Custom RTMP: enter any RTMP URL and stream key
Follow the authorization prompts to connect your account
Enable Auto Start if you want this destination to go live automatically when the stream starts
You can add multiple destinations to stream to several platforms simultaneously. This is called multistreaming.
For a complete guide on connecting platforms, see Connecting Streaming Platforms.
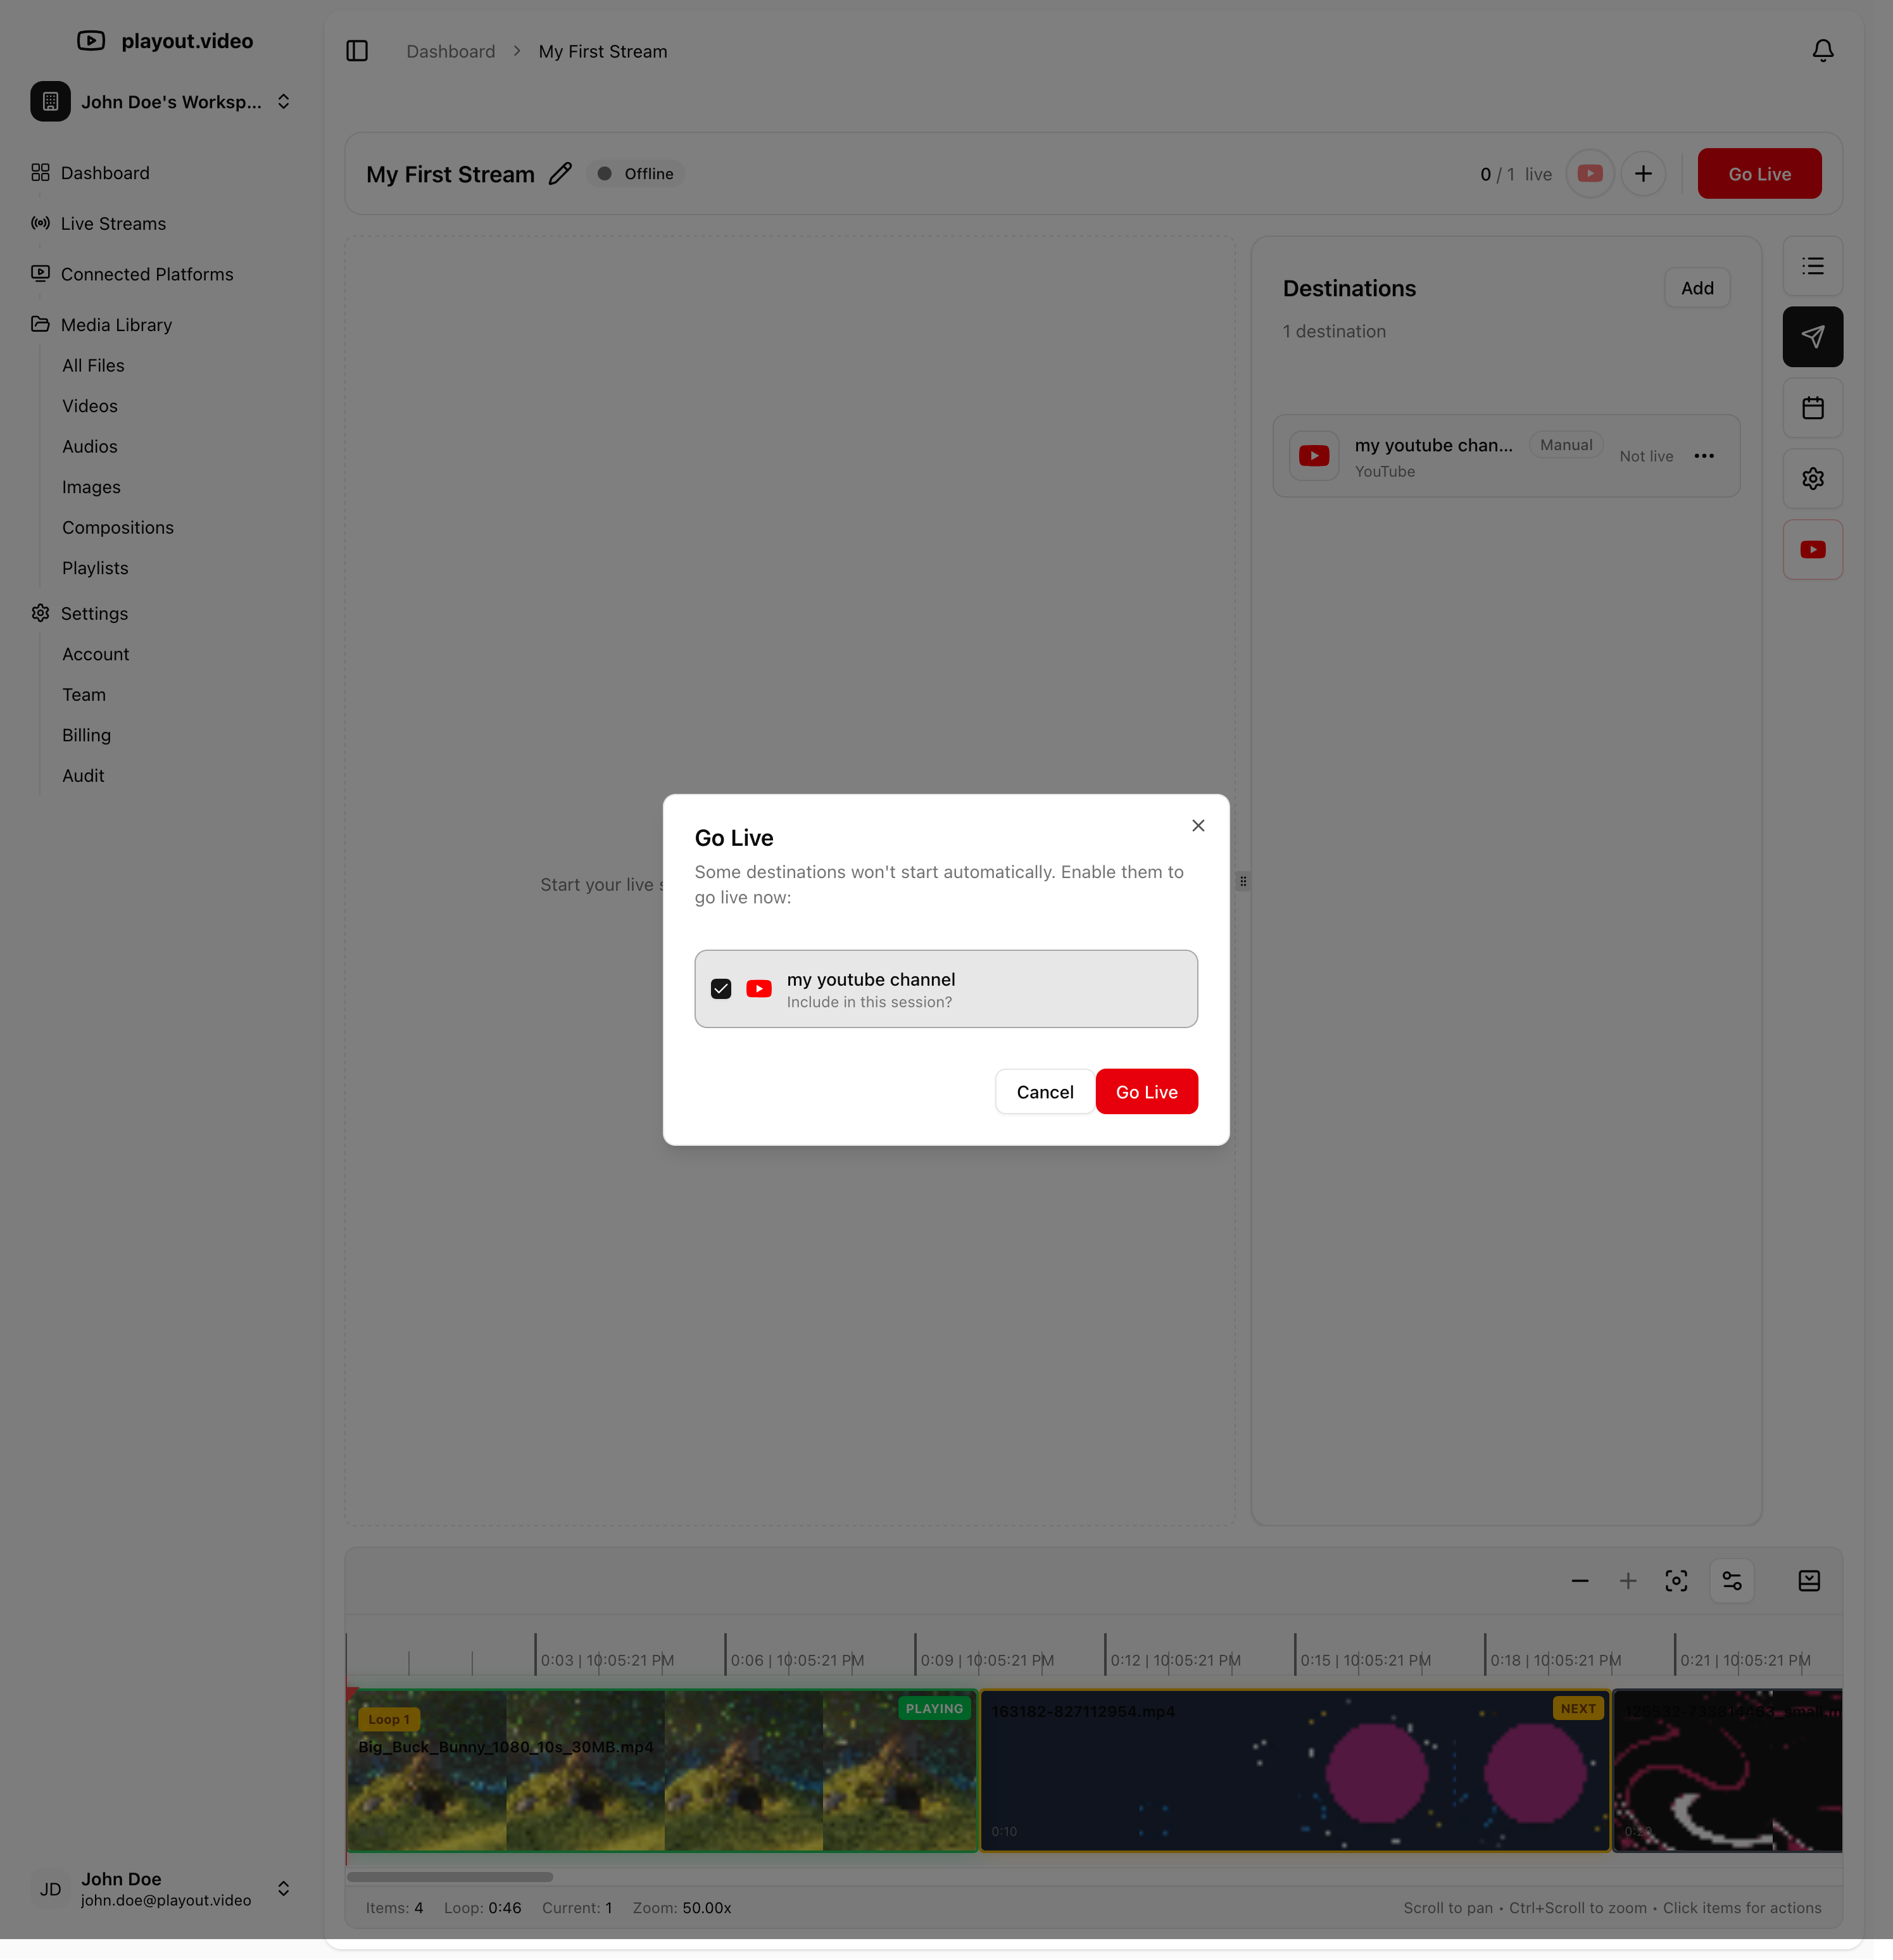
Step 6: Go Live
Everything is set up. Time to launch:
Make sure your playlist has at least one video
Make sure at least one destination is connected
Click the Start Stream button
That's it. Your 24/7 live stream is now running in the cloud. You can close your browser, shut down your computer, and the stream keeps going.
What Happens Next
Once your stream is live:
Auto-loop: Your playlist repeats automatically when it reaches the end
Auto-recovery: If anything interrupts the stream, playout.video automatically restarts it
No downtime: The stream runs 24/7 on our cloud infrastructure, with no hardware needed on your end
Monitor anytime: Check back on the dashboard to see your stream status, viewer count, and health
Optional: Add Overlays
Want to make your stream look more professional? Use the Composition Editor to add:
Your logo or watermark
Text overlays with custom fonts and colors
Now Playing display showing the current video title
Audio visualizer for music streams
See Using the Overlay and Composition Editor for a full walkthrough.
Optional: Set Up a Schedule
Automate your stream with scheduled actions:
Start/stop the stream at specific times
Switch playlists on a schedule (e.g., different content for morning vs. evening)
Start/stop specific destinations independently
Schedules can be one-time or recurring using cron expressions. See Scheduling Streams and Automated Actions.
Troubleshooting
Stream won't start?
Make sure your playlist has at least one video that has finished processing
Check that your destination credentials are valid and the platform is reachable
Video quality looks low?
Check your stream quality settings. You may need to upgrade to a higher tier for 4K or 60fps
Make sure your source videos are high quality; playout.video streams at the quality you configure, but can't upscale low-resolution source files
Stream stopped unexpectedly?
Auto-recovery should restart it automatically within seconds
Check the stream health status on your dashboard for any error messages
Next Steps
Importing Videos from YouTube, quickly build your library from existing content
Building and Managing Playlists, advanced playlist features
Connecting Streaming Platforms, add more destinations
What Is 24/7 Live Streaming and Why You Should Start Today, learn about the benefits of 24/7 streaming