How to Run Your First Live Show With Guests
Step-by-step guide to running a live show with guests in Live Studio: invite people from anywhere, switch between layouts, and broadcast to YouTube, Twitch, and more.
Introduction
Live Studio is the easiest way to run a real live show, interviews, panels, podcasts, classes, sermons, Q&As, watch parties, with guests joining from anywhere in the world. You don't need OBS, you don't need a capture card, and your guests don't need an account.
In this guide we'll set up your first show end-to-end. From clicking Create Live Stream to inviting your first guest to going live on YouTube, the whole thing takes under ten minutes.
What You'll Need
A playout.video account
A webcam and microphone (the ones built into your laptop are fine)
At least one destination connected (YouTube, Twitch, Facebook, TikTok, Kick, LinkedIn, or any custom RTMP/RTMPS target)
Optional: a guest standing by, anyone with a browser and a camera will do
If you haven't connected a destination yet, see Connecting Streaming Platforms first.
Step 1: Create a Live Studio Stream
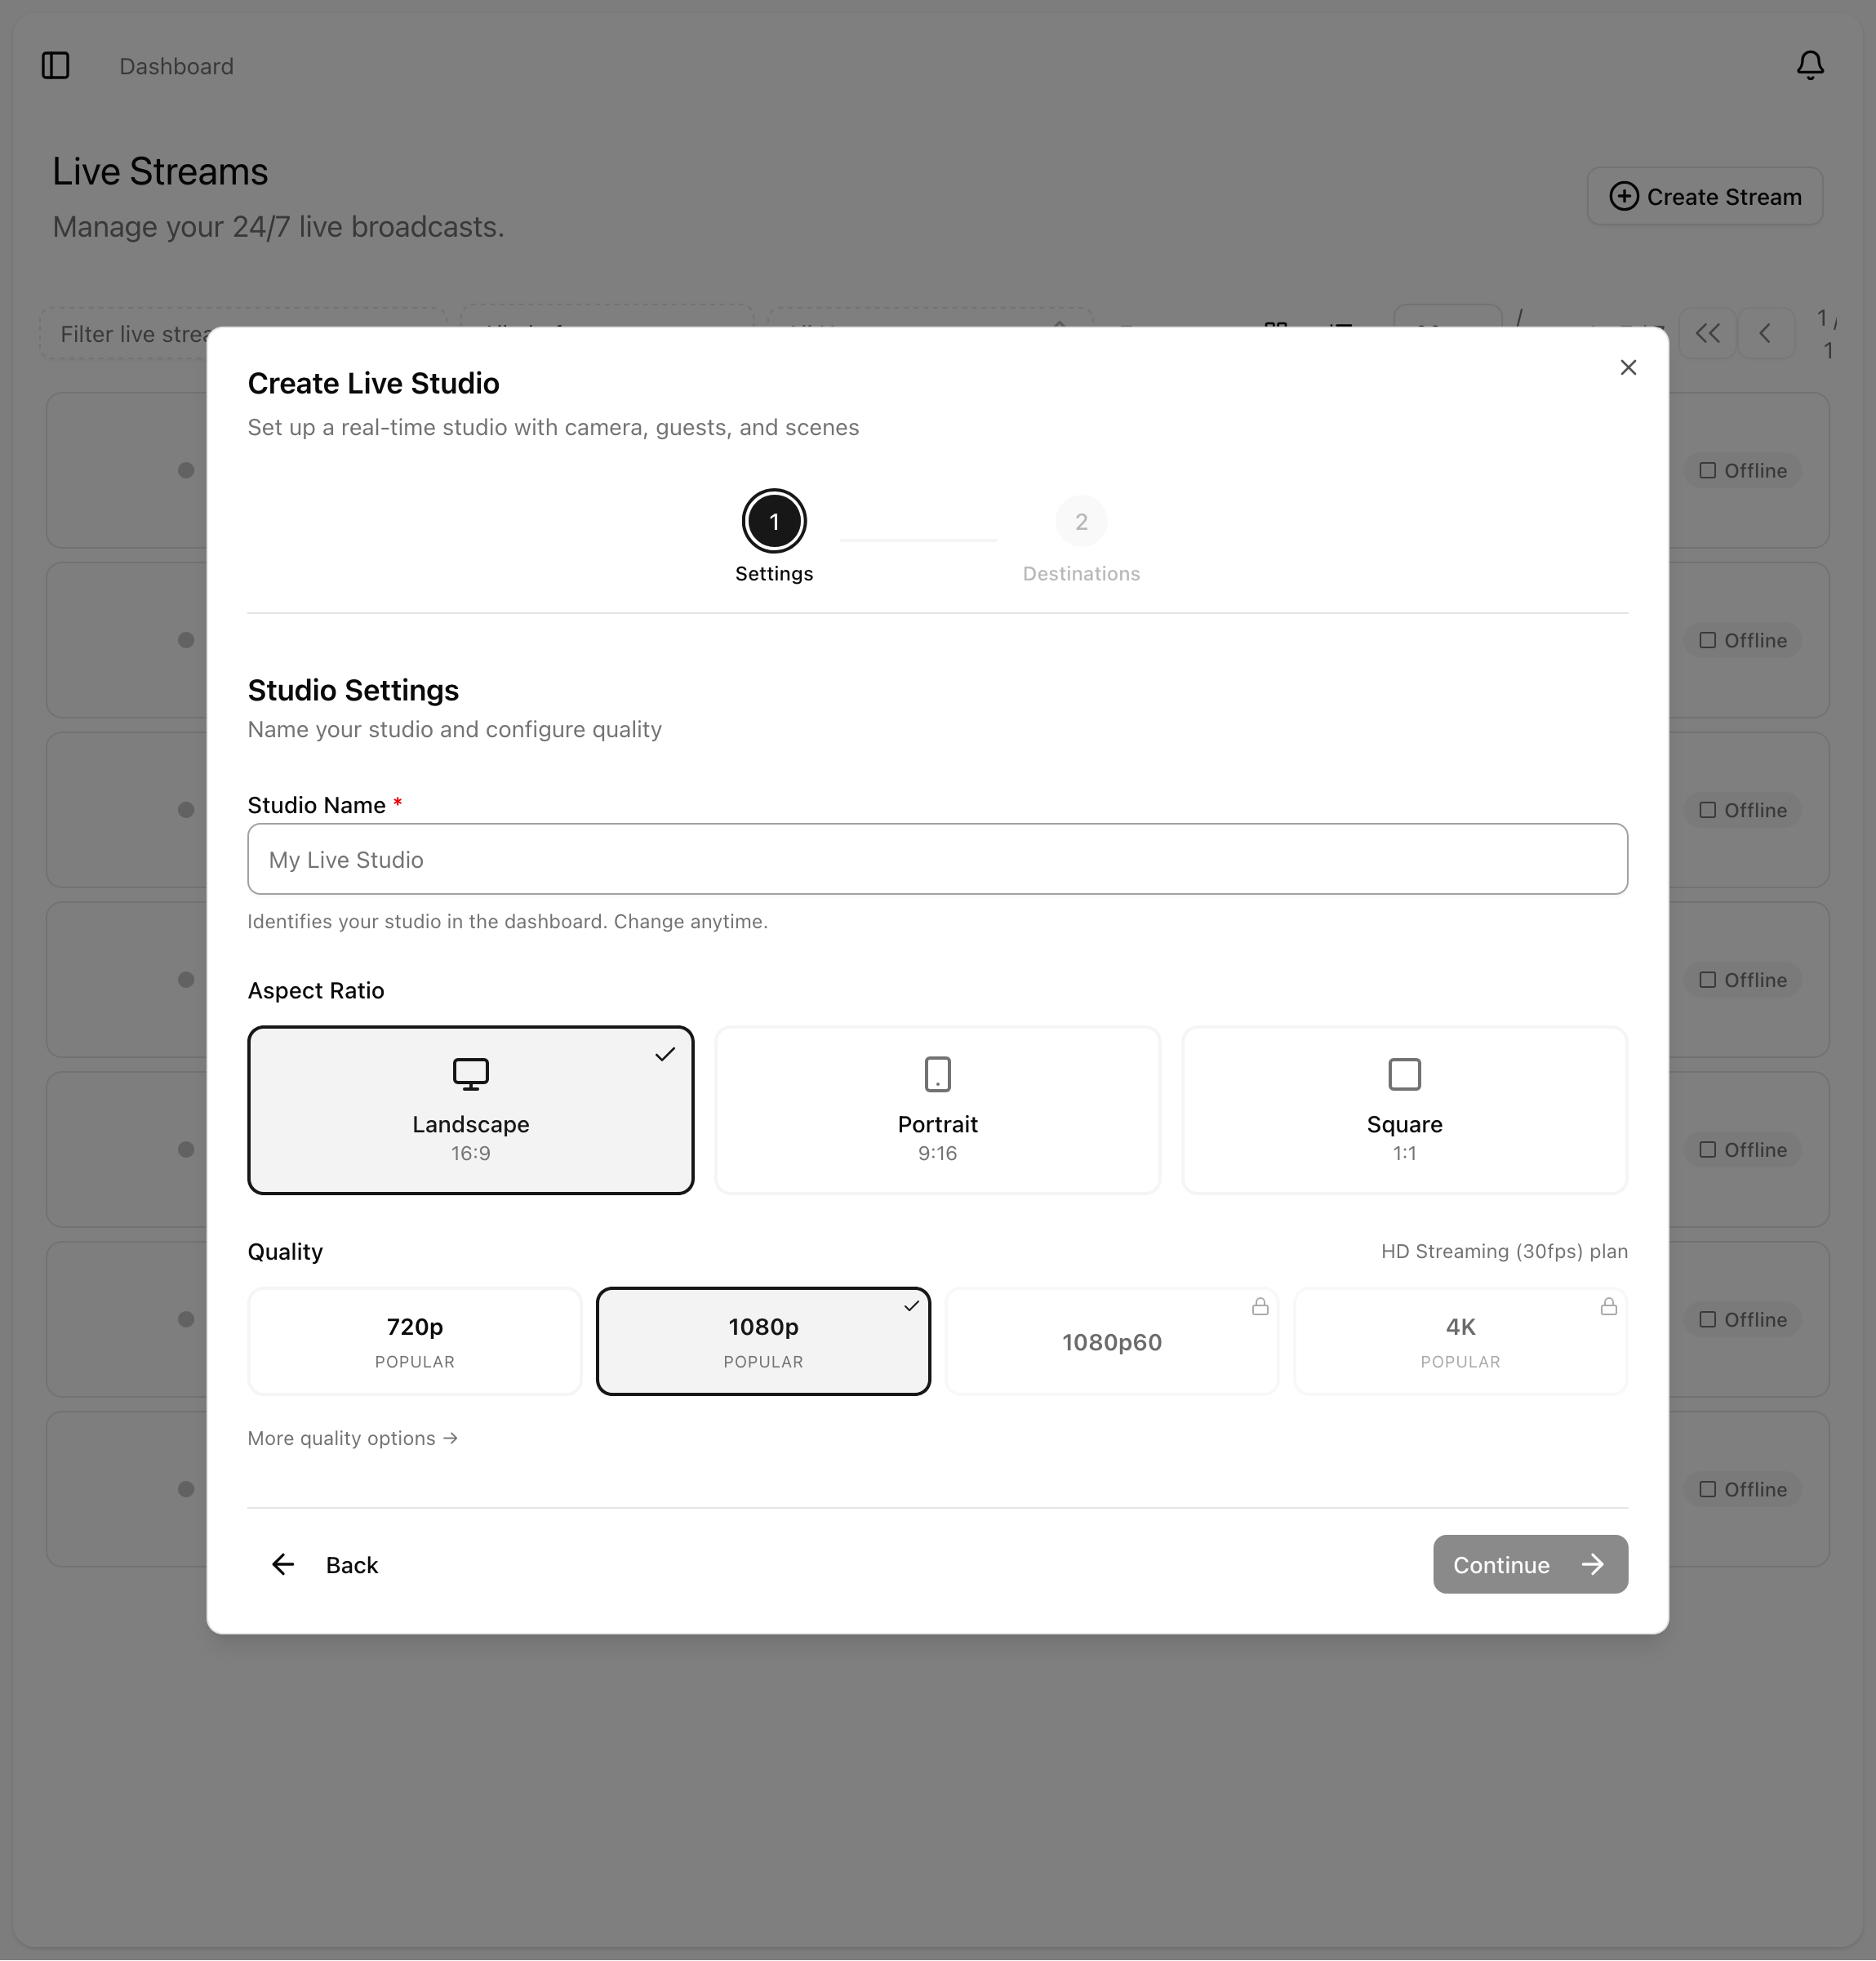
From your dashboard, click Create Live Stream. You'll see three stream types:
Live Channel: always-on TV channel that loops your content 24/7
Live Studio: go live with camera, guests, screen share, and layouts
Scheduled Stream: schedule content in a calendar grid
Pick Live Studio. Give it a name like Friday Q&A or Tuesday Interview Show. Choose your aspect ratio:
Landscape 16:9 for YouTube, Twitch, Facebook, Kick, LinkedIn
Portrait 9:16 for TikTok and YouTube Shorts
Square 1:1 for some Facebook and Instagram contexts
Pick a quality (HD 1080p 30fps is the sensible default), then click Create.
Step 2: Add Your Own Camera
Open the new stream. In the sidebar, click Sources. Then click Add Camera, pick the camera and microphone you want to use, and you'll appear on the canvas as the host.
Drag yourself into position and resize the slot if you like.
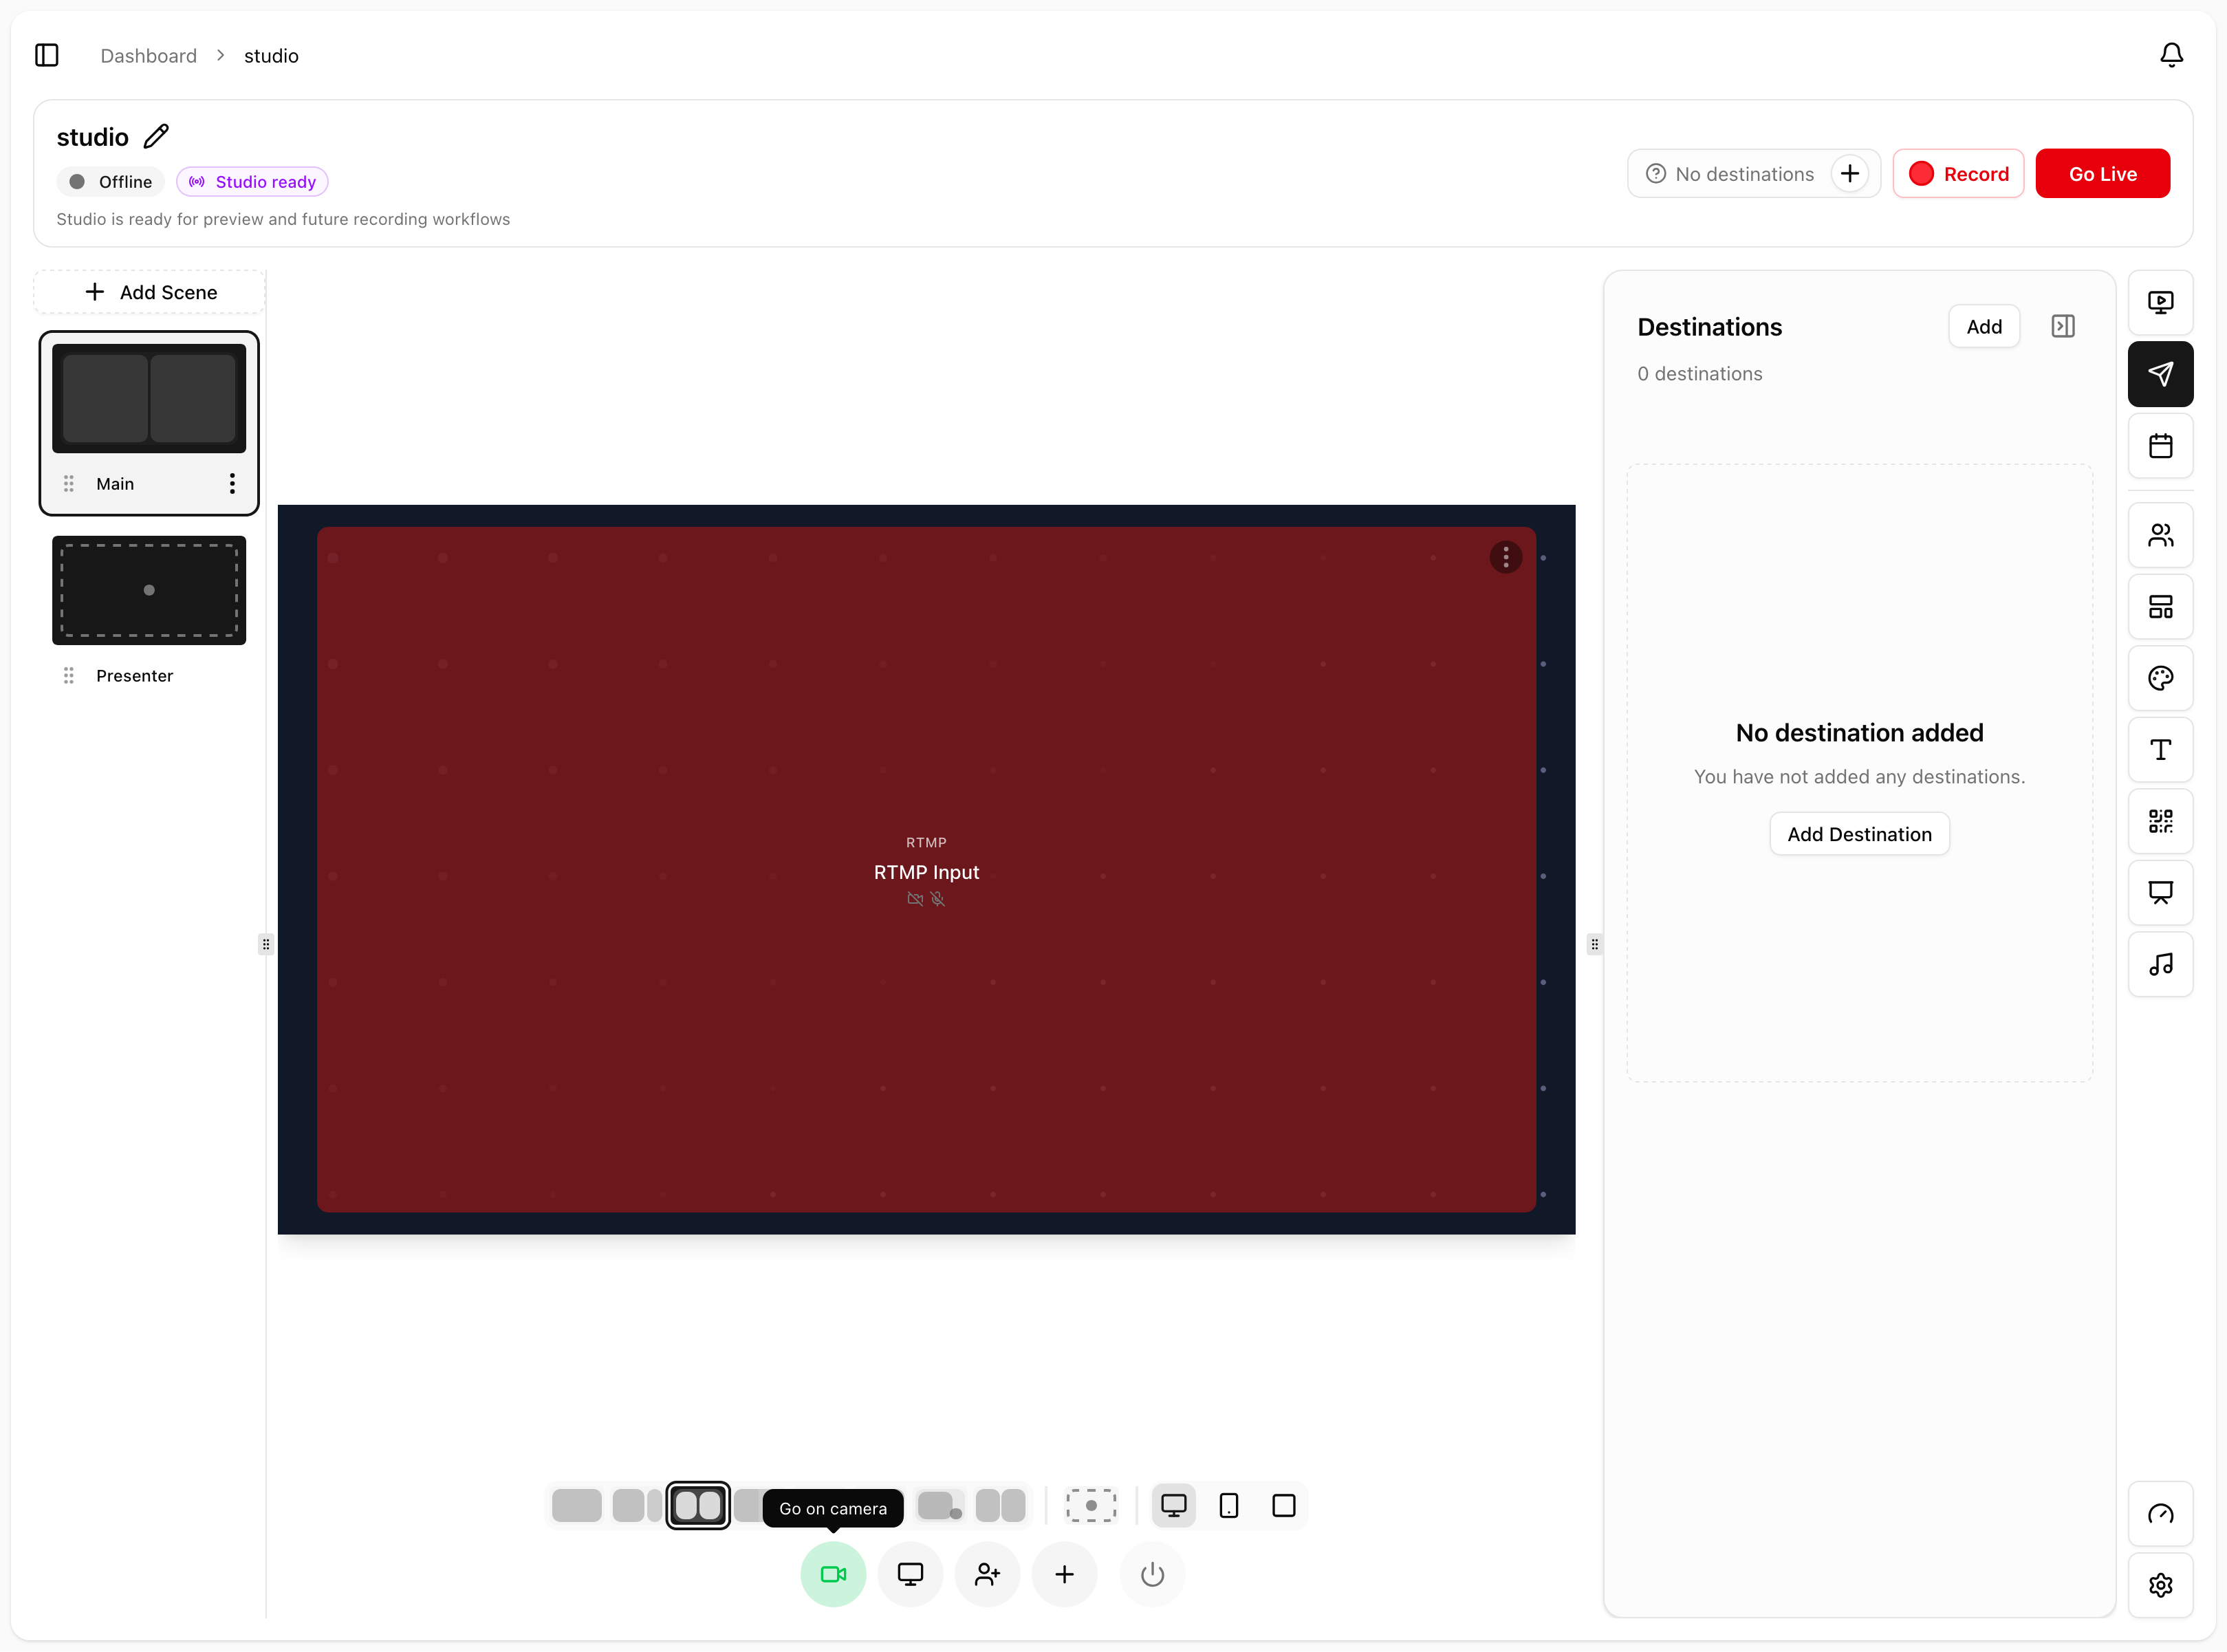
Step 3: Invite a Guest
In the same Sources panel, click Invite guests. A dialog appears with your invite link and a Copy Invite Link button.
Send it to your guest however you like, text, email, DM, anywhere. When they open it, they'll see a quick camera and microphone check, then they'll appear on your canvas alongside you.
If you have a guest who'll join later (a booked interview, a co-host running late), click Add Placeholder to reserve a slot in the layout in advance. You can drop them into the slot the moment they arrive.
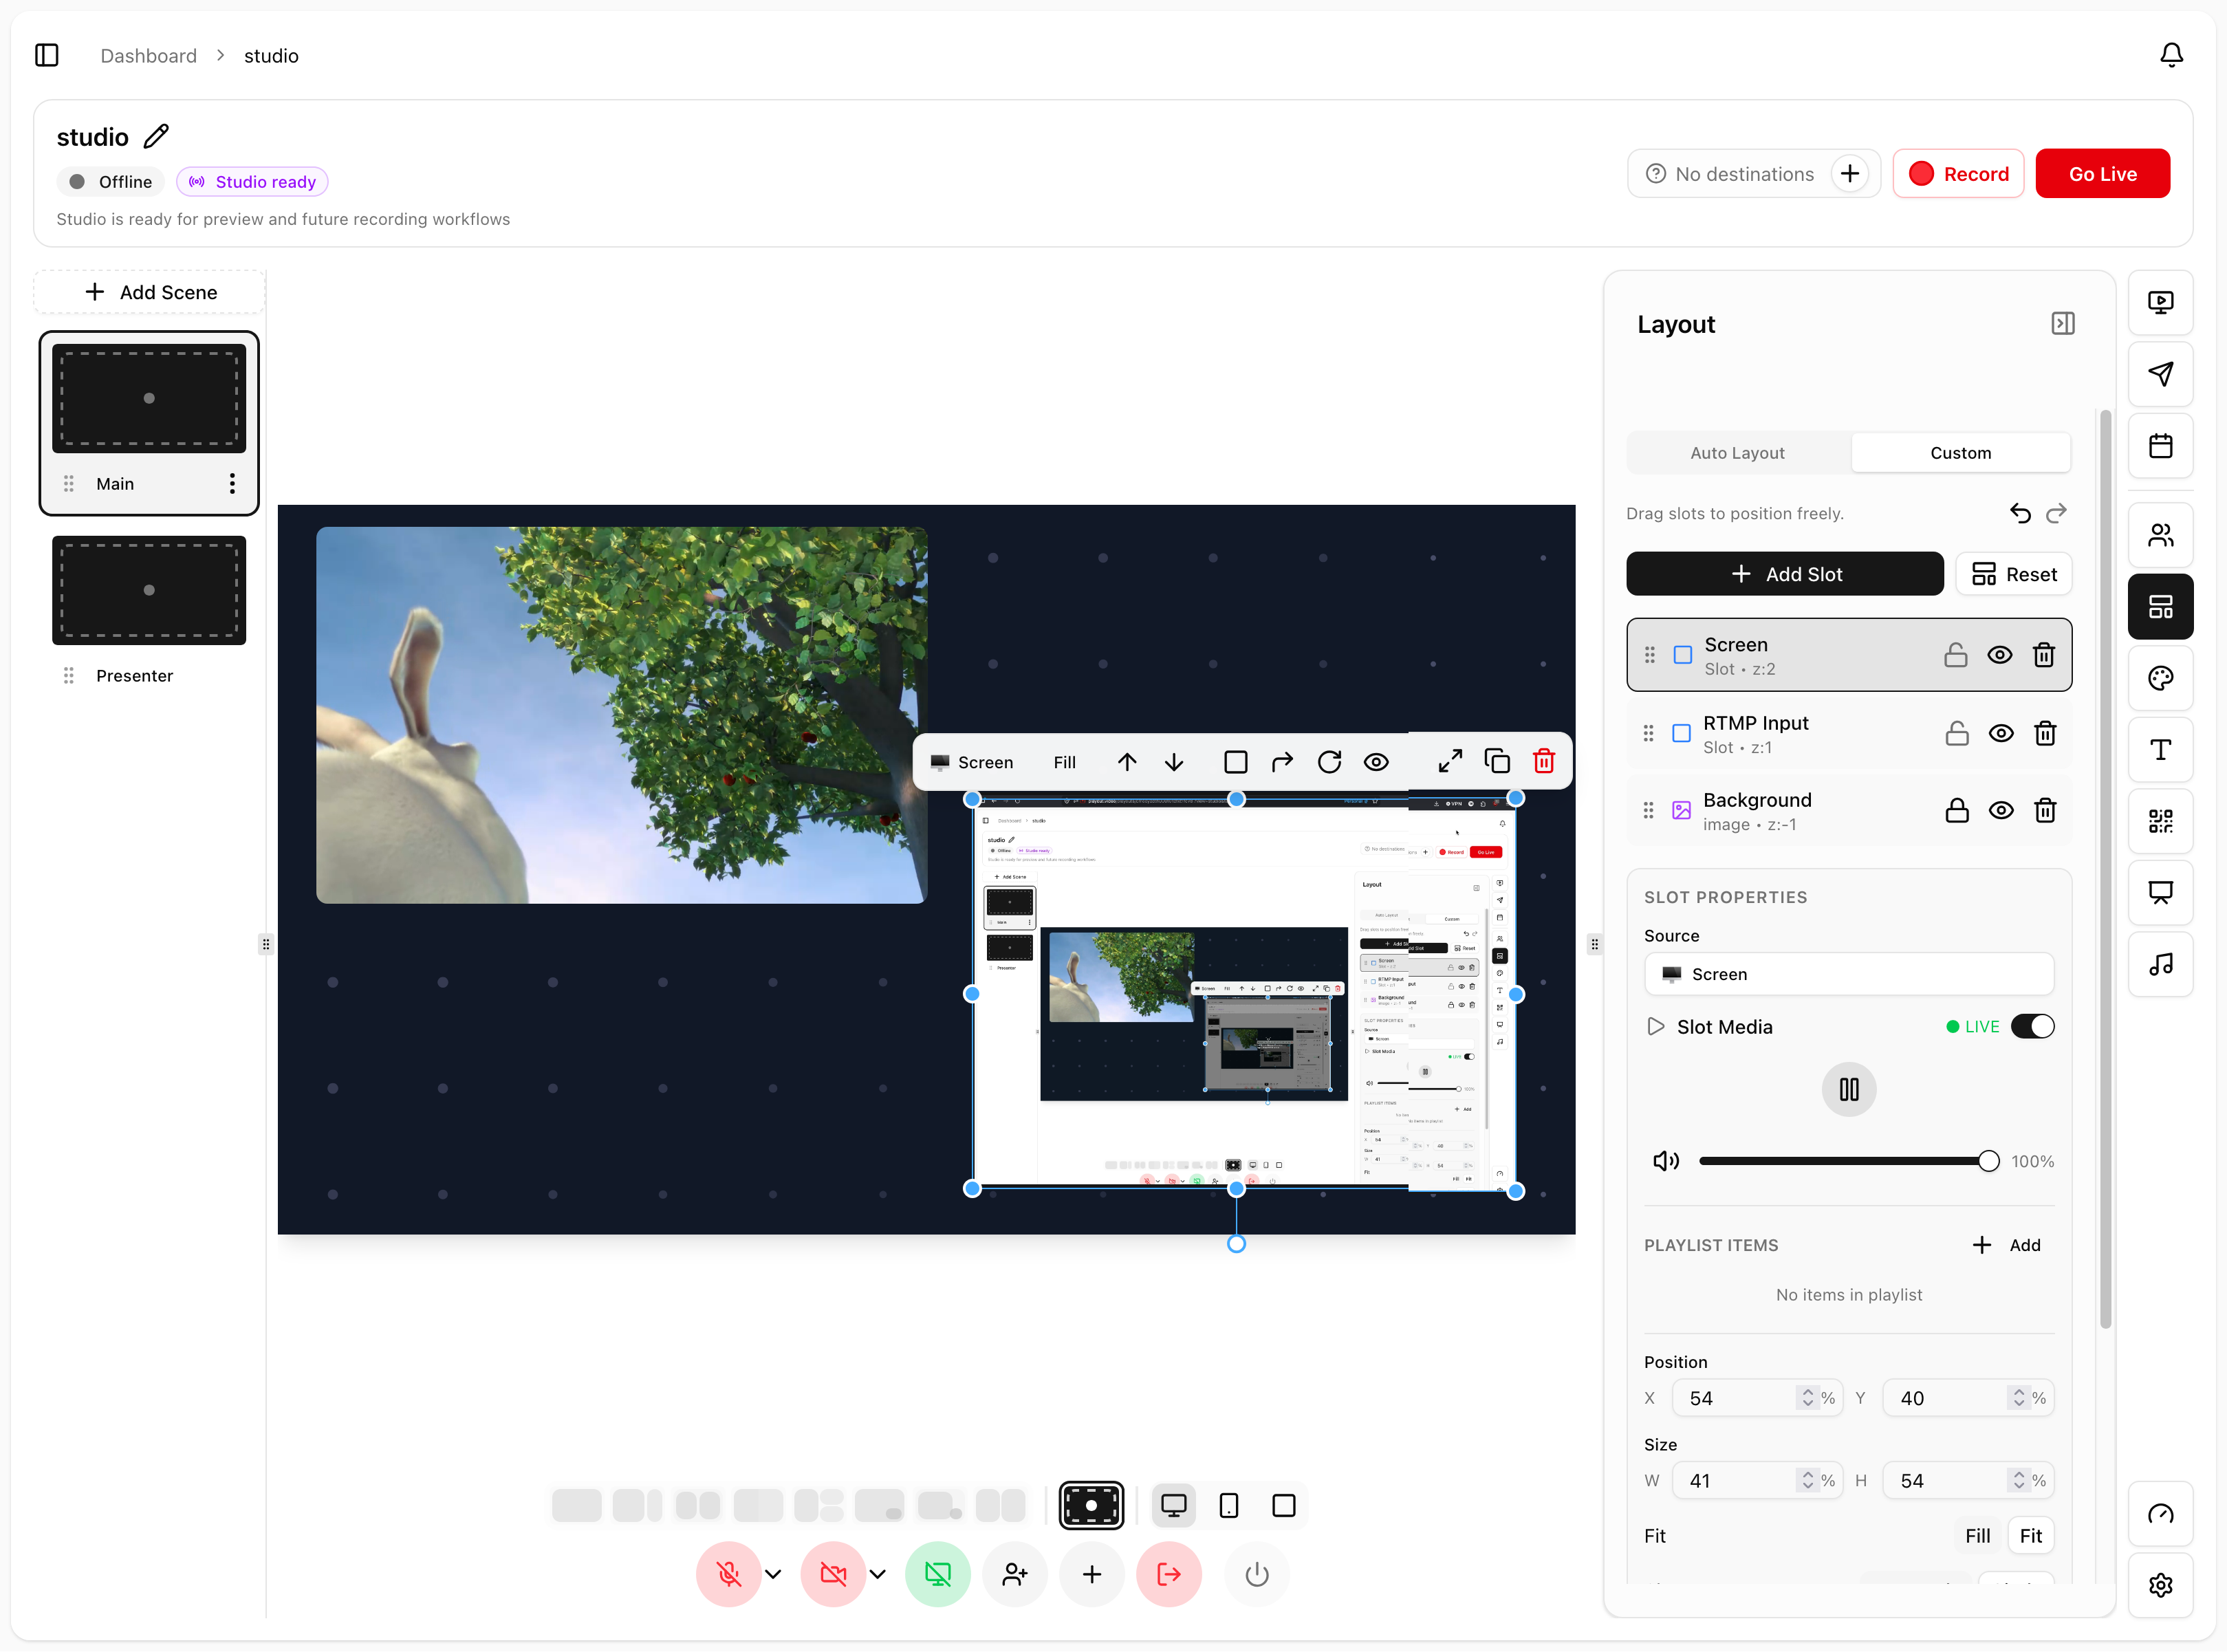
Step 4: Pick a Layout
Click Layout in the sidebar to see the layout presets. A few common picks for your first show:
Spotlight: one source full screen, great for opening monologue
Showtime: host plus content, polished broadcast look
Half Screen: three people, with a key speaker emphasized
Grid: auto-arranges any number of guests into an even grid
Pip: picture-in-picture, content focus with a small camera overlay
Custom: drag-and-drop your own positions and sizes
Click any layout to apply it, instantly, no fade or pause.
Step 5: Add Your Branding
Click Composition in the sidebar to open the Composition Editor and add your logo, channel name, lower-third text, or a Now Playing overlay. These overlays follow you across every layout automatically.
For a full walkthrough see Using the Overlay and Composition Editor.
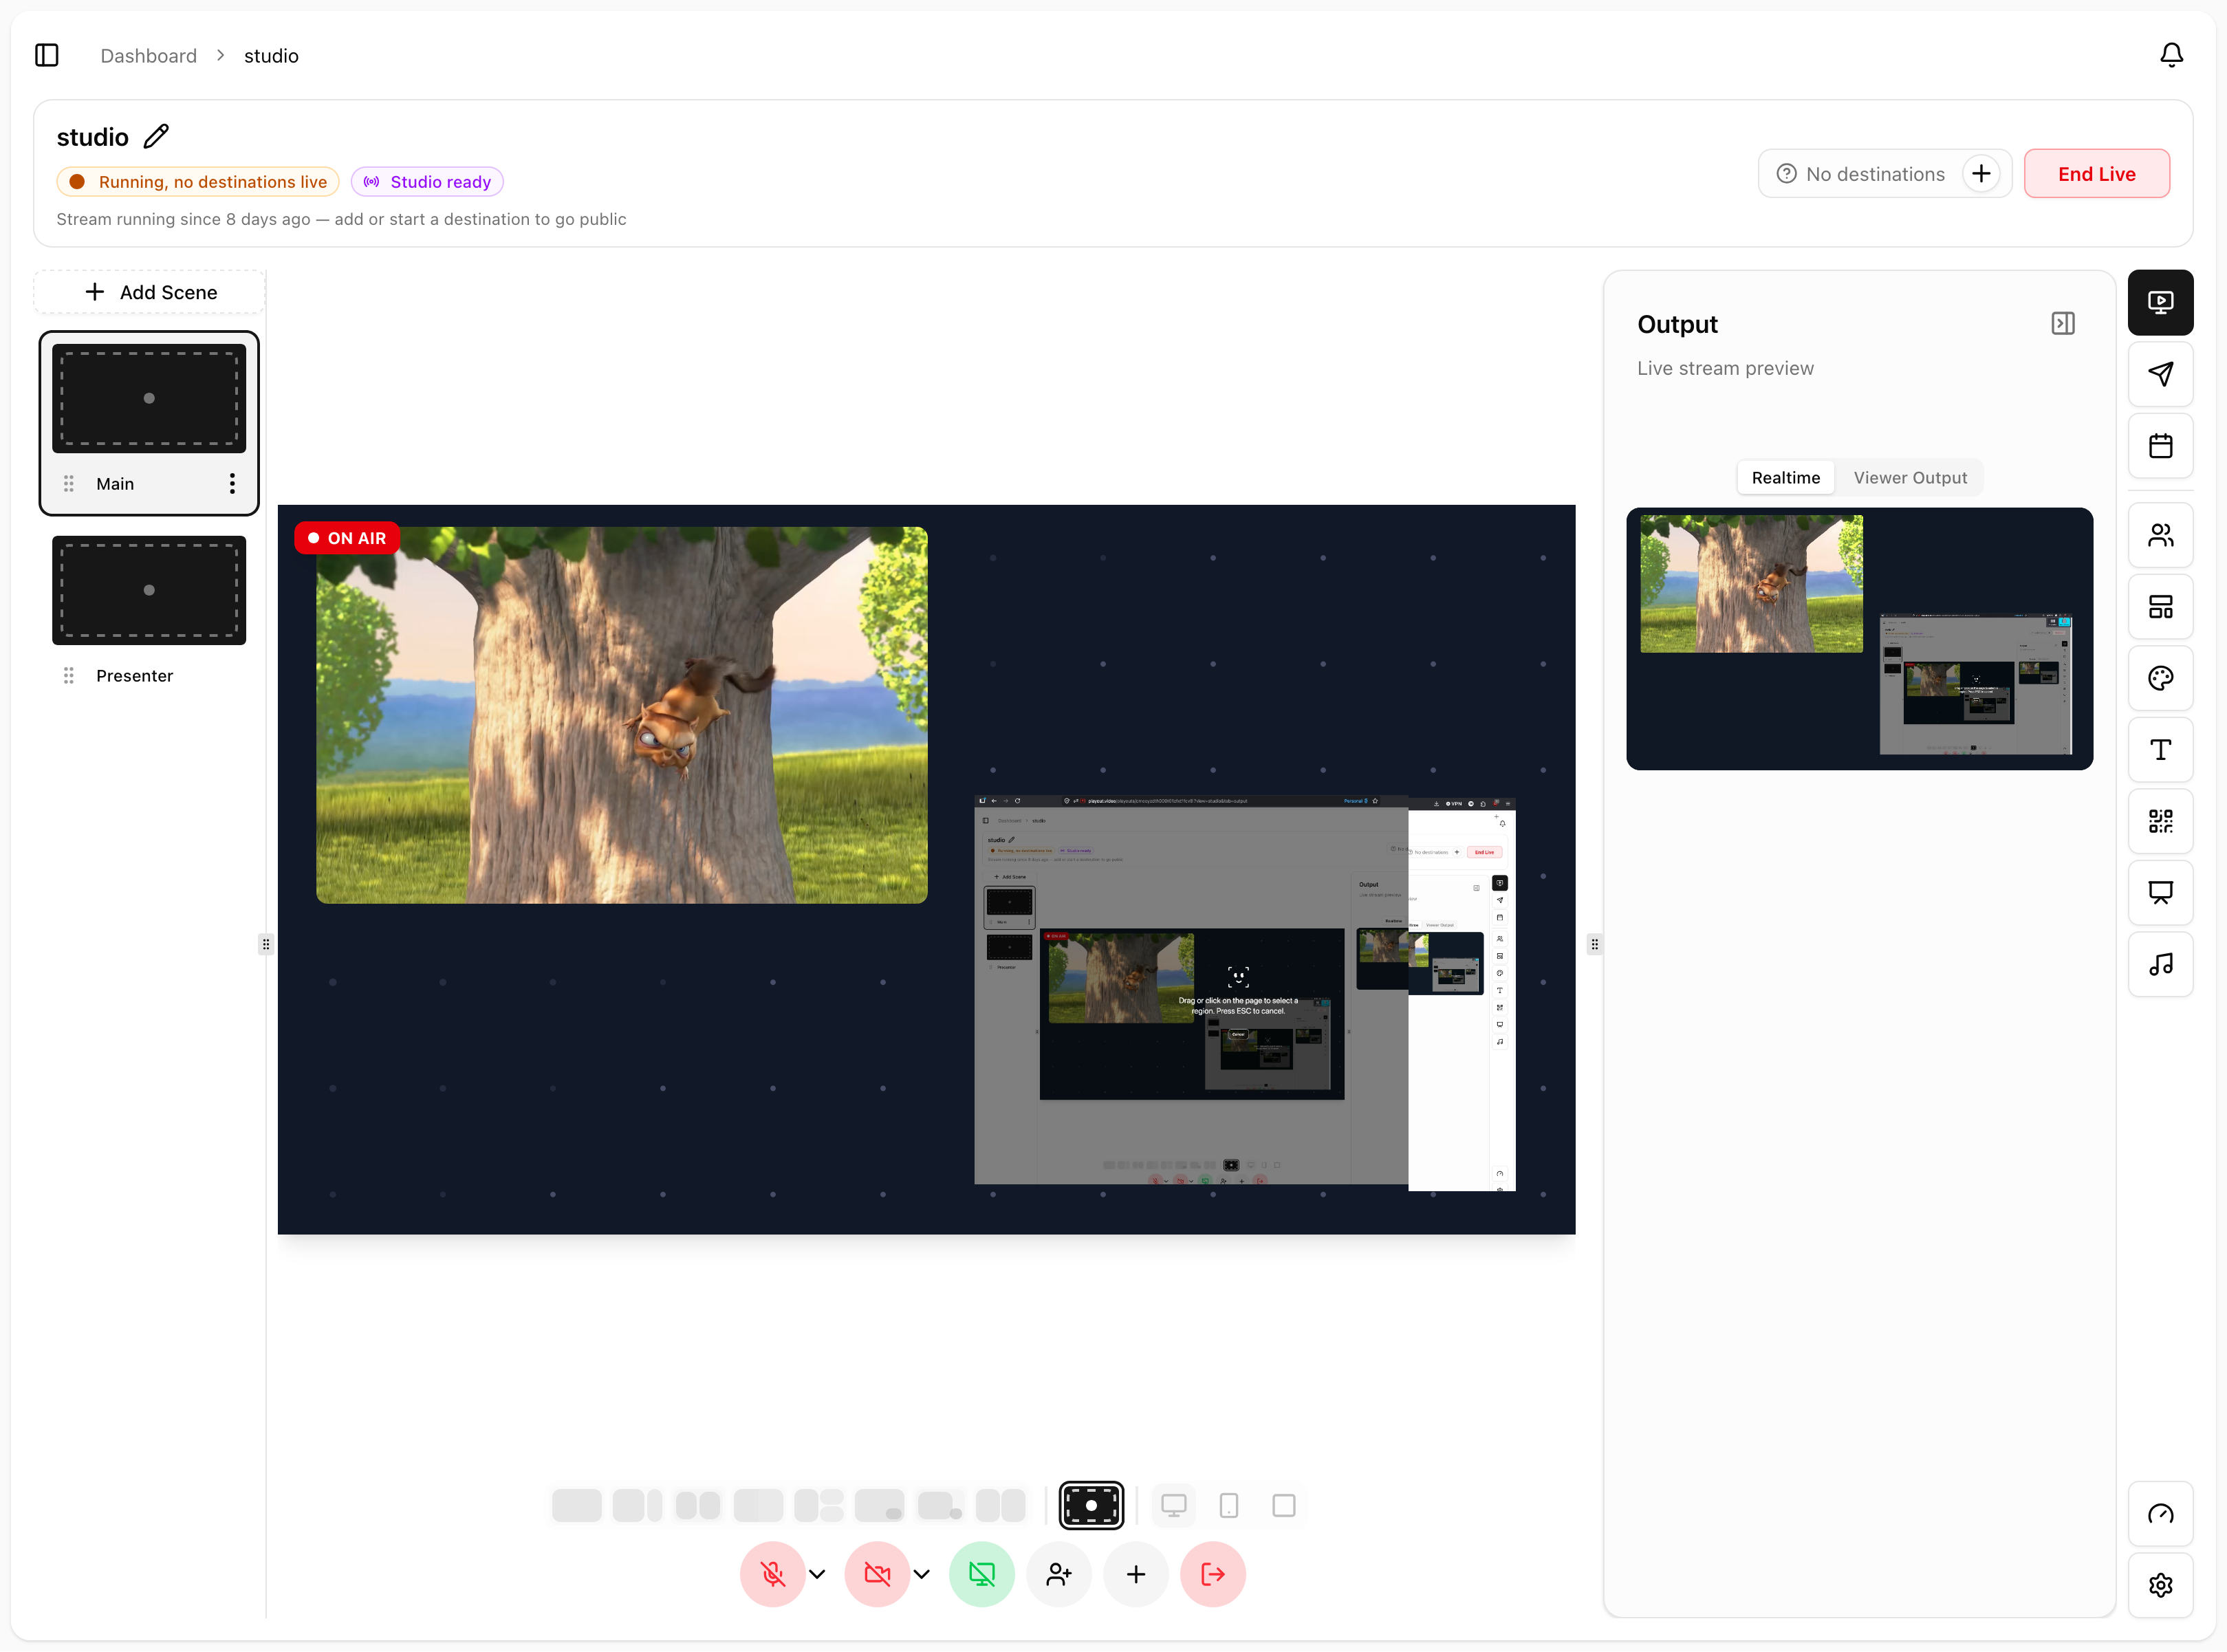
Step 6: Go Live
When you're ready:
Click Destinations in the sidebar and confirm your platform is on
Click Go Live in the top toolbar
Your stream goes out to every connected destination at the same time
The button changes to End Live while you're broadcasting. Click it when you're done.
During the Show
A few things you'll do as your show runs:
Click a layout to switch, instant
Mute or hide a guest if they need to step away
Drop in a clip from your media library, it plays inline, then your show resumes
Share your screen by clicking Add Screen Share in the Sources panel
Switch back to Solo Spotlight for closing remarks
After the Show
Click End Live. Your destinations close out automatically. If recording was on, your full show is saved to your media library and you can repurpose it as a VOD or short clips.
Don't want to broadcast at all? Click Record instead of Go Live to capture a recording-only session, perfect for pre-recording a podcast episode.
Tips for a Smoother Show
Test the link with a guest in advance. Five minutes of pre-flight saves embarrassment.
Use headphones: both you and your guests. It prevents echo.
Build your layouts first, decorate second. Get the show working before you spend time on overlay design.
Keep one solo layout ready. If a guest drops off unexpectedly, click Spotlight and keep talking.